Folders and subfolders
Choose a music folder and include the audio in its subfolders. On desktop, you can also paste a local path or drag files and folders into the app.
Your music, from supported sources
Choose files, a folder or another supported source. Check conversion settings before importing, review progress and keep the completed audio locally available for offline listening.
Real app recordings with a demo music library. Explore the controls, then follow the guide to try them with your own files.
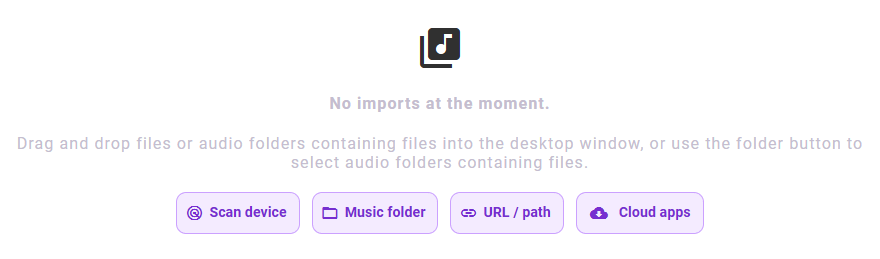
Import a local folder by path, follow the import jobs and see the completion message.
Choose a music folder and include the audio in its subfolders. On desktop, you can also paste a local path or drag files and folders into the app.
Use the device scan to find audio already on your phone or computer. Review the results and select what to import. Available locations depend on your device and file-access permissions.
Import from Google Drive, Dropbox, OneDrive, Box or pCloud using the connections available on your device. Sign in when prompted, or import from a locally synchronized folder.
Connect to WebDAV, Nextcloud, ownCloud or a supported media server. Enter the server address and sign-in details, then browse the music you can access.
Paste direct audio or ZIP download URLs in the URL dialog. ZIP archives can bring several audio files into one import. Use accessible file links; a webpage or subscription-streaming link is not the same as an audio download.
Use Import playlist for M3U, M3U8, PLS or XSPF files: review existing matches and available audio, then import and create the ordered playlist. The general URL importer also accepts supported source lists and RSS feeds.
On Windows, import an audio CD with a compatible drive. The automatic import folder can pick up new audio from an accessible watched location; check its settings before using it for a large collection.
Check audio-import settings before a large import. Disable conversion to keep original formats, or choose MP3 or lossless FLAC conversion and optional normalization. Converting a lossy file to FLAC does not restore lost detail.
Step-by-step setup
Start with music already on your computer or Android device. Choose a folder you know, or review the tracks found by the device scan.
Before you start: Install and open MyMusik. Make sure the audio files are accessible on this device; cloud placeholders may need downloading first.
In Settings, review Audio import before adding files. Turn conversion off to retain source formats, or choose MP3 or FLAC. Existing preferences determine what happens.
Open the Import page from the app navigation. On desktop, you can also drag audio files or folders into the app window.
Select Music folder to choose an audio folder. Select Scan device if you want MyMusik to find tracks in the supported music locations. On desktop, review the scan locations and add a custom folder if needed.
On Android, grant audio access when asked. After scanning, review the results and select the songs, albums or folders you want. The scan does not automatically import everything it finds.
Choose Import selected in the scan results. For a folder import, confirm the folder in the system dialog. Keep the source available while the import finishes.
Open an imported album or song and play a track. The Import page shows active work; an empty import list after completion is not the same as an empty music library.
The selected audio appears in your library and can be played from the device. You can organize the imported collection into folders and playlists afterwards.
If a folder is missing, check its permissions and whether the drive or network share is still connected. On Android, check audio access in system settings. For files stored only with a cloud provider, use the cloud guide below.
Step-by-step setup
Import audio from direct links, source lists and ZIP archives. Desktop also accepts local paths. To preserve a playlist’s order and repeated tracks, use the separate Import playlist action.
Before you start: Have a directly accessible source link or, on desktop, an absolute path. Downloads need an internet connection and enough device storage.
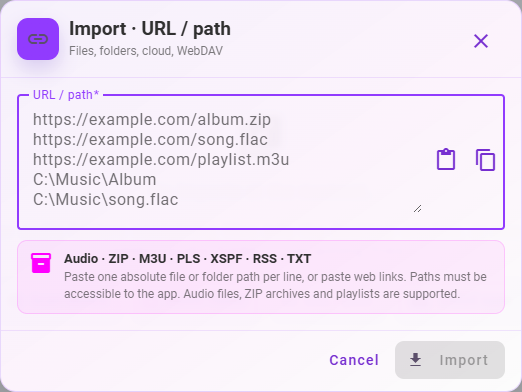
On the Import page, select URL / path. The label is URL on platforms that do not accept local paths.
Paste one source per line. Use a direct audio URL, a ZIP archive URL, or a supported M3U, PLS, XSPF, RSS or TXT source. On desktop, you can also paste absolute paths to audio files, folders or ZIP archives.
Use the import button in the dialog, or Ctrl+Enter on desktop. ZIP archives are unpacked, supported audio is imported and other files are skipped.
Wait for the import to complete, then open the imported tracks in your library. A playlist can only import entries that MyMusik can access.
Accessible audio from your sources is added to the library. The general URL/list import does not promise an ordered playlist; use Import playlist for that.
A normal webpage, a provider sign-in page or a link to a streaming catalogue is not necessarily a direct audio source. If a link fails, try the direct file URL or download the file first. Use the provider connection flow for files that require cloud-account access.
Step-by-step setup
Choose the connection that matches your device: an Android cloud file picker, a synced folder on desktop, or a server connection such as WebDAV.
Before you start: You need access to the source account or server and an internet connection. For Android file-picker imports, install the provider app and sign in first.
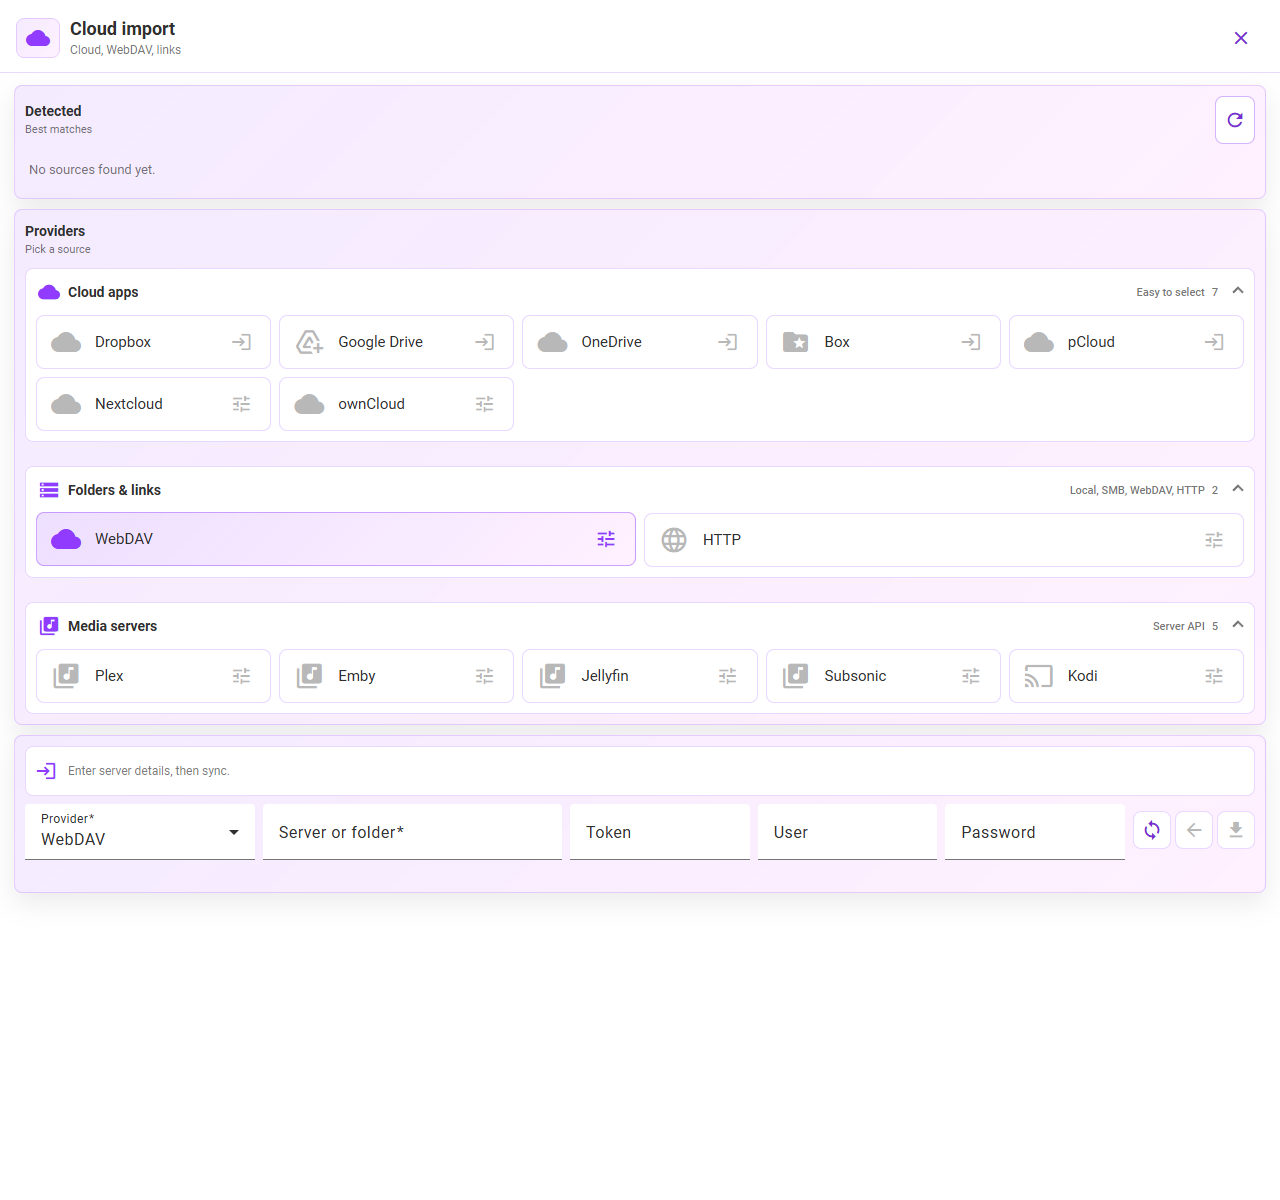
Open Import → Cloud apps. The available sources depend on the platform and installed provider apps. The screenshot shows the Android provider selection in a wide layout.
On Android, use a detected cloud-provider shortcut to select files through the system picker. Supported integrations include Dropbox, Google Drive, OneDrive, Box and pCloud. On desktop, make the files available in the provider’s synced folder, then import that folder through Music folder or a detected source.
For WebDAV, Nextcloud, ownCloud or a media server, select the matching provider. Enter the server or folder address and the requested login or token, then use the connect/refresh control. Use the provider’s WebDAV endpoint when that connection requires one.
If the selected integration offers a browser sign-in, authorize access on the provider’s page and return to MyMusik. This option depends on the platform and whether authorization is configured; it is not shown for every desktop source.
Browse to the music folder and use the import control for the files or folder you need. For Android picker imports, confirm the system selection and wait for the copy-to-device job to finish.
Open a downloaded track in your library. Before relying on offline playback, verify it still plays when the connection is unavailable.
The selected audio becomes part of your MyMusik library. Importing existing files is separate from setting up MyMusik cloud backup or device synchronization.
If a provider is missing from the Android picker, open its app, sign in and check that it exposes files to the system picker. On desktop, download online-only files in the sync client. If server browsing fails, check the endpoint and credentials. An “authorization not configured” message requires another available import method or a configured integration.
This screenshot shows the English app interface.

Yes. Choose an accessible folder, or use a path or drag and drop on desktop. The device scan can also find supported audio for you to review and select. Available controls depend on the native host.
Available integrations include Google Drive, Dropbox, OneDrive, Box and pCloud. Access depends on platform support, provider configuration and authorization. On desktop, a synchronized local provider folder is another import source.
Yes. MyMusik accepts supported audio and ZIP download URLs. It also handles supported playlist and feed sources. Use a link that provides accessible media, rather than a webpage requiring playback in another service.
Wait for import or download to finish and check that the audio is stored locally. Then test playback without a connection. Connecting a provider alone does not download your entire cloud collection.
Disable import conversion before importing if you want to keep the original format. You can alternatively choose MP3 or lossless FLAC as the conversion target. Keep a separate backup of important originals.
Use an accessible mounted folder or an available connection such as WebDAV, Nextcloud, ownCloud or a supported media server. The server must be reachable and permit access to the selected audio.
Check the configured import location in MyMusik before adding files. The location depends on the host and settings; keep the folder accessible and review conversion and acceptance preferences first.
Use Import playlist for M3U, M3U8, PLS or XSPF. Review matches and available sources, then import the audio and create the playlist. Order and repeated entries are preserved. Relative paths need the original folder or base URL; missing sources require review.
Visit the download page, install MyMusik and try one music folder first.
Check the current plans for cloud storage and AI allowances before choosing a plan.